Showing posts with label spinach. Show all posts

January 24, 2013

Petite Paquets - French for "I'll have another"


Happy New Year! In my first full post of 2013, and a long overdue one at that, I want to share a dish that is perfect for nearly any occasion. This favorite recipe of mine satiates any crowd from holiday party goers to dinner guests to potluck attendees to wine night enthusiasts to Superbowl viewers (go 49ers!), these petite paquets or little packages can be served as appetizers, side dishes, or savory brunch pastries.  This is a truly versatile recipe that you should always have on hand.

Best yet, for all of us who promise to strive to stay healthy this year, my petite paquets are packed with vitamins and low in fat. The leafy greens and apples in this recipe add vitamins A, C, and K to your diet, while their high fiber content will fill you up.  This dish leaves your taste buds satisfied and doesn’t require stretchy pants!
Petite paquets on a bed of spinach for a mid afternoon snack

Petite Paquets with Greens and Apples
1 medium brown onion, diced
2 cloves garlic, minced
3 tbsp olive oil
3 medium apples (I prefer Braeburn), diced
4 stalks celery, diced
6 cups baby spinach
3 cups kale, chopped with stems removed
1 ½ tsp butter, melted
½ cup spiced walnuts, finely chopped (recipe follows)

The day before making this recipe remove phyllo (or, fillo) dough from the freezer and place in your refrigerator unopened to defrost.

Preheat oven to 400° F.  Remove phyllo dough from refrigerator and let stand at room temperature while you’re making the filling.  I must digress here for a moment while we’re on the topic of phyllo dough. I’m half Armenian and when I was a little girl my grandmother would spend hours making the most delicious pastry desserts called baklava. When I would visit during her Armenian baklava (there a many different varieties of baklava) making escapades I would help her carefully layer the thin dough with a sweet mixture made predominantly of walnut, cinnamon, and orange flower water. It was such a treat to help with the process to create these tiny, but elaborate desserts, and enjoy the melt in your mouth pastries after all that hard work! As I grew up and remembered how much I loved phyllo dough in those desserts I started using it in other recipes. I became even more intrigued by it once I learned how low in fat and calories it is relative to other pastry or pie dough. I encourage you to compare the nutrition facts on the box to other pastry dough!  Now that I’ve whet your appetite and calmed your health conscious fears, back to the recipe.

In a large sauté pan (6 qt is preferable, but 4qt will work), heat the onion garlic and olive oil over medium heat until onions begin to soften.  Add in celery and apples and cook over medium heat for 5 minutes.  Working in batches, mix in the kale and allow it to wilt slightly before adding in the spinach. Reduce heat to low and let the greens cook down for about 5 minutes.
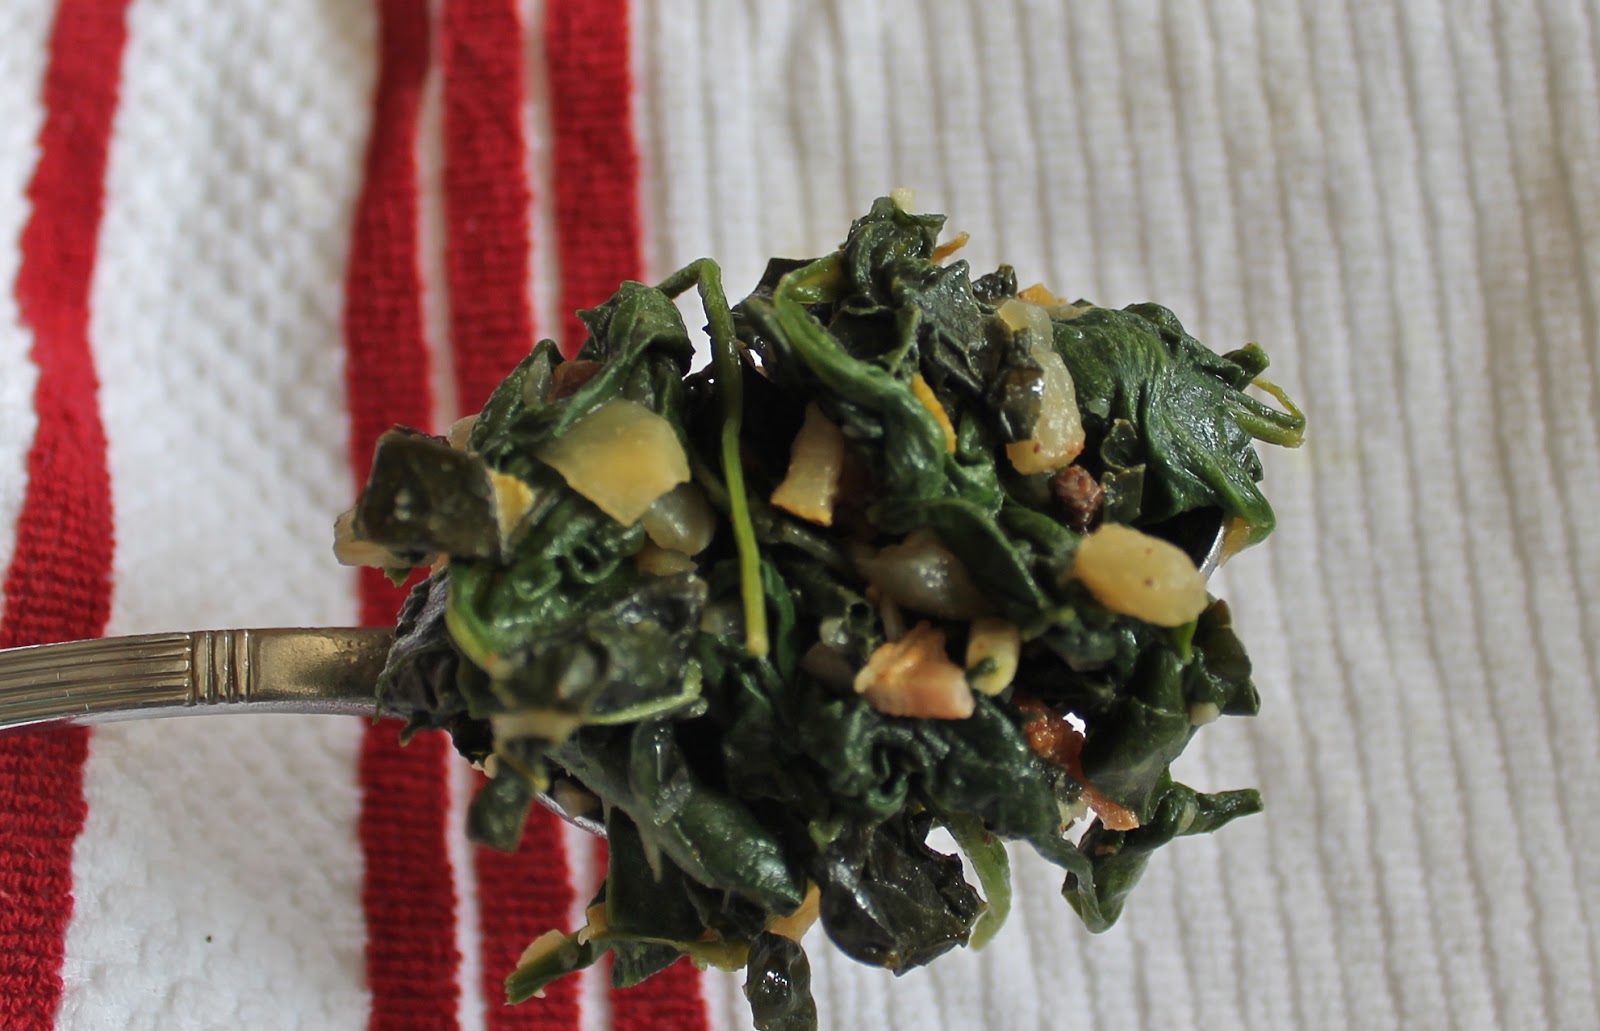
Delicious and healthy greens! 

While the filling is cooking down, lightly and I mean lightly – think like you’re trying to pet a butterfly – brush the cups of a muffin pan with butter. You don’t want to add too much butter or the paquets will be soggy; you should have melted butter leftover.

Carefully unroll the thawed phyllo dough. If you find the dough difficult to unroll take a slightly damp tea towel and wrap it around the dough for approximately 15 minutes. Taking 4 sheets of phyllo at a time (layered on top of one another) place them on a dry cutting board and using a sharp knife cut into 5”x 6” rectangles. Lay the rectangles into each muffin cup and repeat until you have filled the muffin tin. Note: the filling of this recipe will make 24 individual paquets when using a standard muffin tin.  
Once the filling has cooked down, fill each of the muffin tin cups with the greens mixture. Sprinkle desired amount of spiced walnuts on top of the mixture. For those of you who want to take these to the next level of decadent, crumble some bacon on top of the paquets along with the walnuts! Carefully bring all 4 corners of the dough into the center, but do not press completely closed. Brush the tops of the paquets lightly with the remaining melted butter.

Bake for 8-10 minutes, or until paquets are golden brown.  Remove from oven and let cool for about 5 minutes before serving. The petite paquets are also delicious cold or room temperature. This dish truly is versatile and you can incorporate any other veggies or ingredients you have on hand. Some of my favorite variations include adding mushrooms, leeks, or fennel, or replacing the apples with pears!  Savor sinlessly!


What other combinations would you use for the filling?


Spiced Walnuts
1 cup walnut halves
1 tsp walnut oil (olive oil will also work)
1 tsp agave syrup (or honey)
1 heaping tbsp brown sugar
Pinch of cayenne pepper
Pinch of cinnamon
½ tsp kosher salt

These spiced walnuts are even more versatile than the petite paquets! Serve them as snacks, sprinkled on butternut squash soup, in muffins, or on top of oatmeal. The options are really endless.

In a large skillet, heat walnut halves, oil and agave over medium heat, stirring frequently. If the mixture appears too sticky, add a half teaspoon of warm water. Add sugar, cayenne and salt and mix thoroughly until the nuts are well coated and a rich brown color. For those of you with a high heat tolerance, feel free to add a little extra cayenne. Remove from the stove and spread into a single layer on a parchment lined cutting board or cookie sheet.

Note: this recipe will make more than the require amount of walnuts for the petite paquets. 

April 4, 2012

Spinach-Artichoke Stuffed Mushrooms

I can’t believe it’s been over a month since I’ve had a chance to share some delicious recipes! But don’t worry, I’ve still been busy in the kitchen. :) One recipe I’ve been having fun making is stuffed mushrooms and not the boring, soggy kind you defrost and bake. 
 
Mushrooms are technically out of season, but thankfully most local grocery stores still stock delicious, fresh and firm fungi to make this dish possible all year long.  You’ll find a healthy helping of vitamins B and D, as well as protein in most mushrooms, so try to get a helping in whenever you can. The best part about this recipe is its versatility. You can throw it together with just a few ingredients, or really go all out by experimenting with new combinations for the filling.  Another aspect that makes this recipe one you’ll want to always keep on hand is how it can fit almost anywhere on a menu, from an amuse bouche or appetizer to part of the main course! 

Spinach-Artichoke Stuffed Mushrooms
1 pound baby bella mushrooms (mini-portabellas, you can also use cremini)
5-6 artichoke hearts (in water or oil) finely diced
2 cups baby spinach leaves, roughly chopped
¼ cup finely diced brown onion
3 cloves garlic, crushed
1 tbsp butter
2 tbsp olive oil, divided
truffle salt
Freshly ground black pepper
2 slices black forest bacon, optional (I’m obsessed with the Wellshire brand)

Before you even think about starting this recipe, make sure you take the time at the store to select the best mushrooms! Baby bella mushrooms have great flavor and meatiness, but cremini mushrooms are a good substitute if you can’t find good baby bellas. Stay away from button mushrooms, which do not have as much flavor. When choosing your mushrooms make sure that they are not too small, firm, free from bruises and check under the cap of the mushroom to see that their gills are rather tightly closed (gills are the small brown ridges you’ll see under the cap of a mushroom).  Gently clean the mushrooms by thoroughly wiping them with a damp paper towel.

Now that you have the perfect bunch of mushrooms onto the actual cooking! Pre-heat your oven to 400 degrees and line a cookie sheet with parchment paper. In a medium skillet, heat 1 tablespoon of the olive oil.  Add the finely chopped onion and garlic and sauté until the onions are soft.  

After cleaning mushrooms, remove their stems. Set aside 3 mushrooms and place the remaining de-stemmed mushrooms on the baking sheet, gills up. Finely chop the mushrooms you set aside and add to the onion and garlic, along with the 1 tablespoon butter.  Add the artichokes and sauté for approximately 3 minutes, stirring occasionally. Next add the chopped spinach leaves and continue cooking until leaves are wilted.  Season the mixture with a pinch of truffle salt and ground black pepper to taste. 

Using a small spoon (I even use a teaspoon measure), fill mushrooms with the spinach-artichoke mixture. Use a small pastry brush and generously dab the remaining 1 tablespoon of olive oil on the caps of the mushrooms, completely covering the sides.  Place the mushrooms in the oven and bake for 10 minutes, checking occasionally to ensure that the exterior of the mushrooms do not dry out. If you think the mushrooms are getting a little dry, use the pastry brush to coat with a little extra olive oil. 

If you’re in an indulgent mood, or are a bacon addict (you know who you are), fry two slices of bacon in a hot skillet while the mushrooms are cooking and drain on paper towels. Once bacon is cool enough to handle, cut away some excess fat and finely chop the remains. It’s ok to leave some fat; our goal is to get the crispy not chewy parts for a topping. 

Once the mushrooms have finished baking, they should be soft not mushy, promptly remove and sprinkle with a tad more truffle salt and black pepper.  If you’re living on the wild side, top with the bacon bits!  Enjoy your fungus!  


December 31, 2011

Christmas Traditions: Winter Salad and Wreath Cookies

My mom starts decorating for Christmas on Thanksgiving weekend and by December 25th my parents’ house could be used for the cover of a Martha Stewart magazine. The holidays are always a hectic time, but I love coming home and feeling the wonderful warmth and excitement that seems to only be present at my parents’. With this Christmas potentially the last time that my brother will be able to come home (he’s graduating from Annapolis this summer and becoming a Marine pilot), it’s an especially important Christmas in my family.

We have many traditions in my family and my favorite, of course, revolves around food! I am obsessed with a winter salad that my mom invented many years ago, while my brother and his sweet tooth can’t have a Christmas without our special wreath “cookies.”  These two dishes hold a special place in our family  -- we can’t start our Christmas dinner without Mom’s winter salad and my brother and I make a sticky mess each Christmas Eve molding the wreath cookies.

This year is no exception and I’m happy to share both recipes with you!

The Winter salad is laden with good-for-you ingredients that make it a little easier to say “yes” to those wreath cookies, knowing that you’ve filled up on a healthy vitamin packed salad. 


Winter Salad Ingredients (Serves 4)

4 cups baby spinach
1/2 cup pine nuts
1 to 2 cucumbers
2 avocados
1/2 cup dried cranberries
3 ounces goat cheese, crumbled
1 bunch green onions
4 artichoke hearts
Salt and Pepper to taste


Champagne Dressing

1/2 cup champagne vinegar
2 tablespoons Dijon mustard
Salt and Pepper to taste
1-2 garlic cloves crushed
2/3 cup extra virgin olive oil


Thoroughly wash and dry the spinach and place in a large salad bowl. Feel free to substitute the spinach for your favorite greens. I like using spinach though, since it’s a fantastic source of vitamins C, A, K and fiber. Place the pine nuts in a small pan and toast over medium-low heat until golden brown. Make sure to stir the pine nuts frequently so that they don’t burn. Remove from the heat and let cool.

Peel and slice the cucumbers and avocados to a bite-sized pieces. Sometimes avocados can be a little temperamental when you cut them. I’ve found the best (and quickest) way to slice avocados is to first cut them in half length wise and remove the pit. Score the flesh of the avocado length-wise and width-wise to form small squares. Then gently push the skin side towards the flesh so that the skin-side becomes concave. Take a knife and coax the avocado off the skin onto the salad. Easy, right?

Mix the cucumbers, avocados, cranberries, toasted pine nuts, goat cheese and Champagne dressing (see directions below) with the spinach. Plate the tossed spinach on salad plates. Chop the green onions (white and green parts) and slice the artichoke hearts in half. Garnish the salad with the chopped onions and artichoke hearts, which are a great source of potassium and fiber!

For the dressing…

Combine the vinegar, crushed garlic, two tablespoons Dijon mustard and salt and pepper in a small bowl. Slowly pour in the olive oil while quickly whisking the mixture. Alternatively, you can place the first 4 ingredients in a blender and slowly add the olive oil while pulsing the blender.

Onto the wreath cookies! 


Wreath Cookie Ingredients (makes 20-25)

1 bag large marshmallows
½ cup butter or margarine
1 tsp vanilla extract
5-6 drops green food coloring
3 ¾ cups cornflakes
Red sprinkles
Coconut flakes (optional)

Wax paper
Margarine for shaping the cookies

In a large pot melt the marshmallows and butter over medium heat, stirring as needed. After the ingredients are melted stir in the vanilla and food coloring. Turn off the heat and mix in the cornflakes  until they’re completely incorporated into the marshmallow mixture. Allow mixture to cool for a few minutes. While the cookies are cooling, tape a long sheet of wax paper (about 4 feet long) to a clear and clean work surface and spoon 2 tablespoons of margarine onto a small plate.

Now time to form the cookies! This part gets a bit messy, but the margarine helps and this mess is actually fun!  Lightly coat your fingers in the margarine and scoop out about 1-2 tablespoons of the cornflake mixture onto the wax paper and begin forming the mixture into a ring. Repeat with the remaining mixture until it’s all gone. Generously sprinkle the wreath cookies with the red sprinkles to give them a more festive look. If you’re feeling especially festive lightly sprinkle the wreaths with some coconut flakes to give the effect of snow!  Feel free to snack along the way J and of course re-coat your fingers as necessary to keep them from getting too sticky.

Enjoy and Merry Christmas!


Note: Nutritional Information comments derived from the article “Spinach: Health Benefits” from www.webnd.com